A great deal of my time working as a web/UI designer is spent exporting and/or converting images for software products and websites. Although a lot of modern applications can render image conversions at build time, a custom conversion is sometimes requested for an image to be set as webp.
You could download one of the many native apps from the Mac App Store to do this for you - but why not create your own script and run it with a simple right-click directly inside Finder? Let's do just that!
Basic requirements
Important!: As of this time of writing, the official libwebp package release is libwebp-1.2.1-mac-10.15. If this has been updated since then, change the command below to match that of the proper release version.
1) First you will need to download the libwebp package to your Downloads folder: developers.google.com/speed/webp/download
- Look for the "Download for macOS link"
2) Next we will need to copy the cwebp folder to our /usr/local/bin directory:
- Open macOS Terminal
- Run sudo cp /Downloads/libwebp-1.2.1-mac-10.15/bin/cwebp /usr/local/bin
- Note: if the /usr/local/bin directory doesn't exist, simply create it by running: sudo cd /usr/local && mkdir bin
Creating our custom Automator script
1) Open the macOS Automator from the Applications folder
2) Select Quick Option from the first prompt
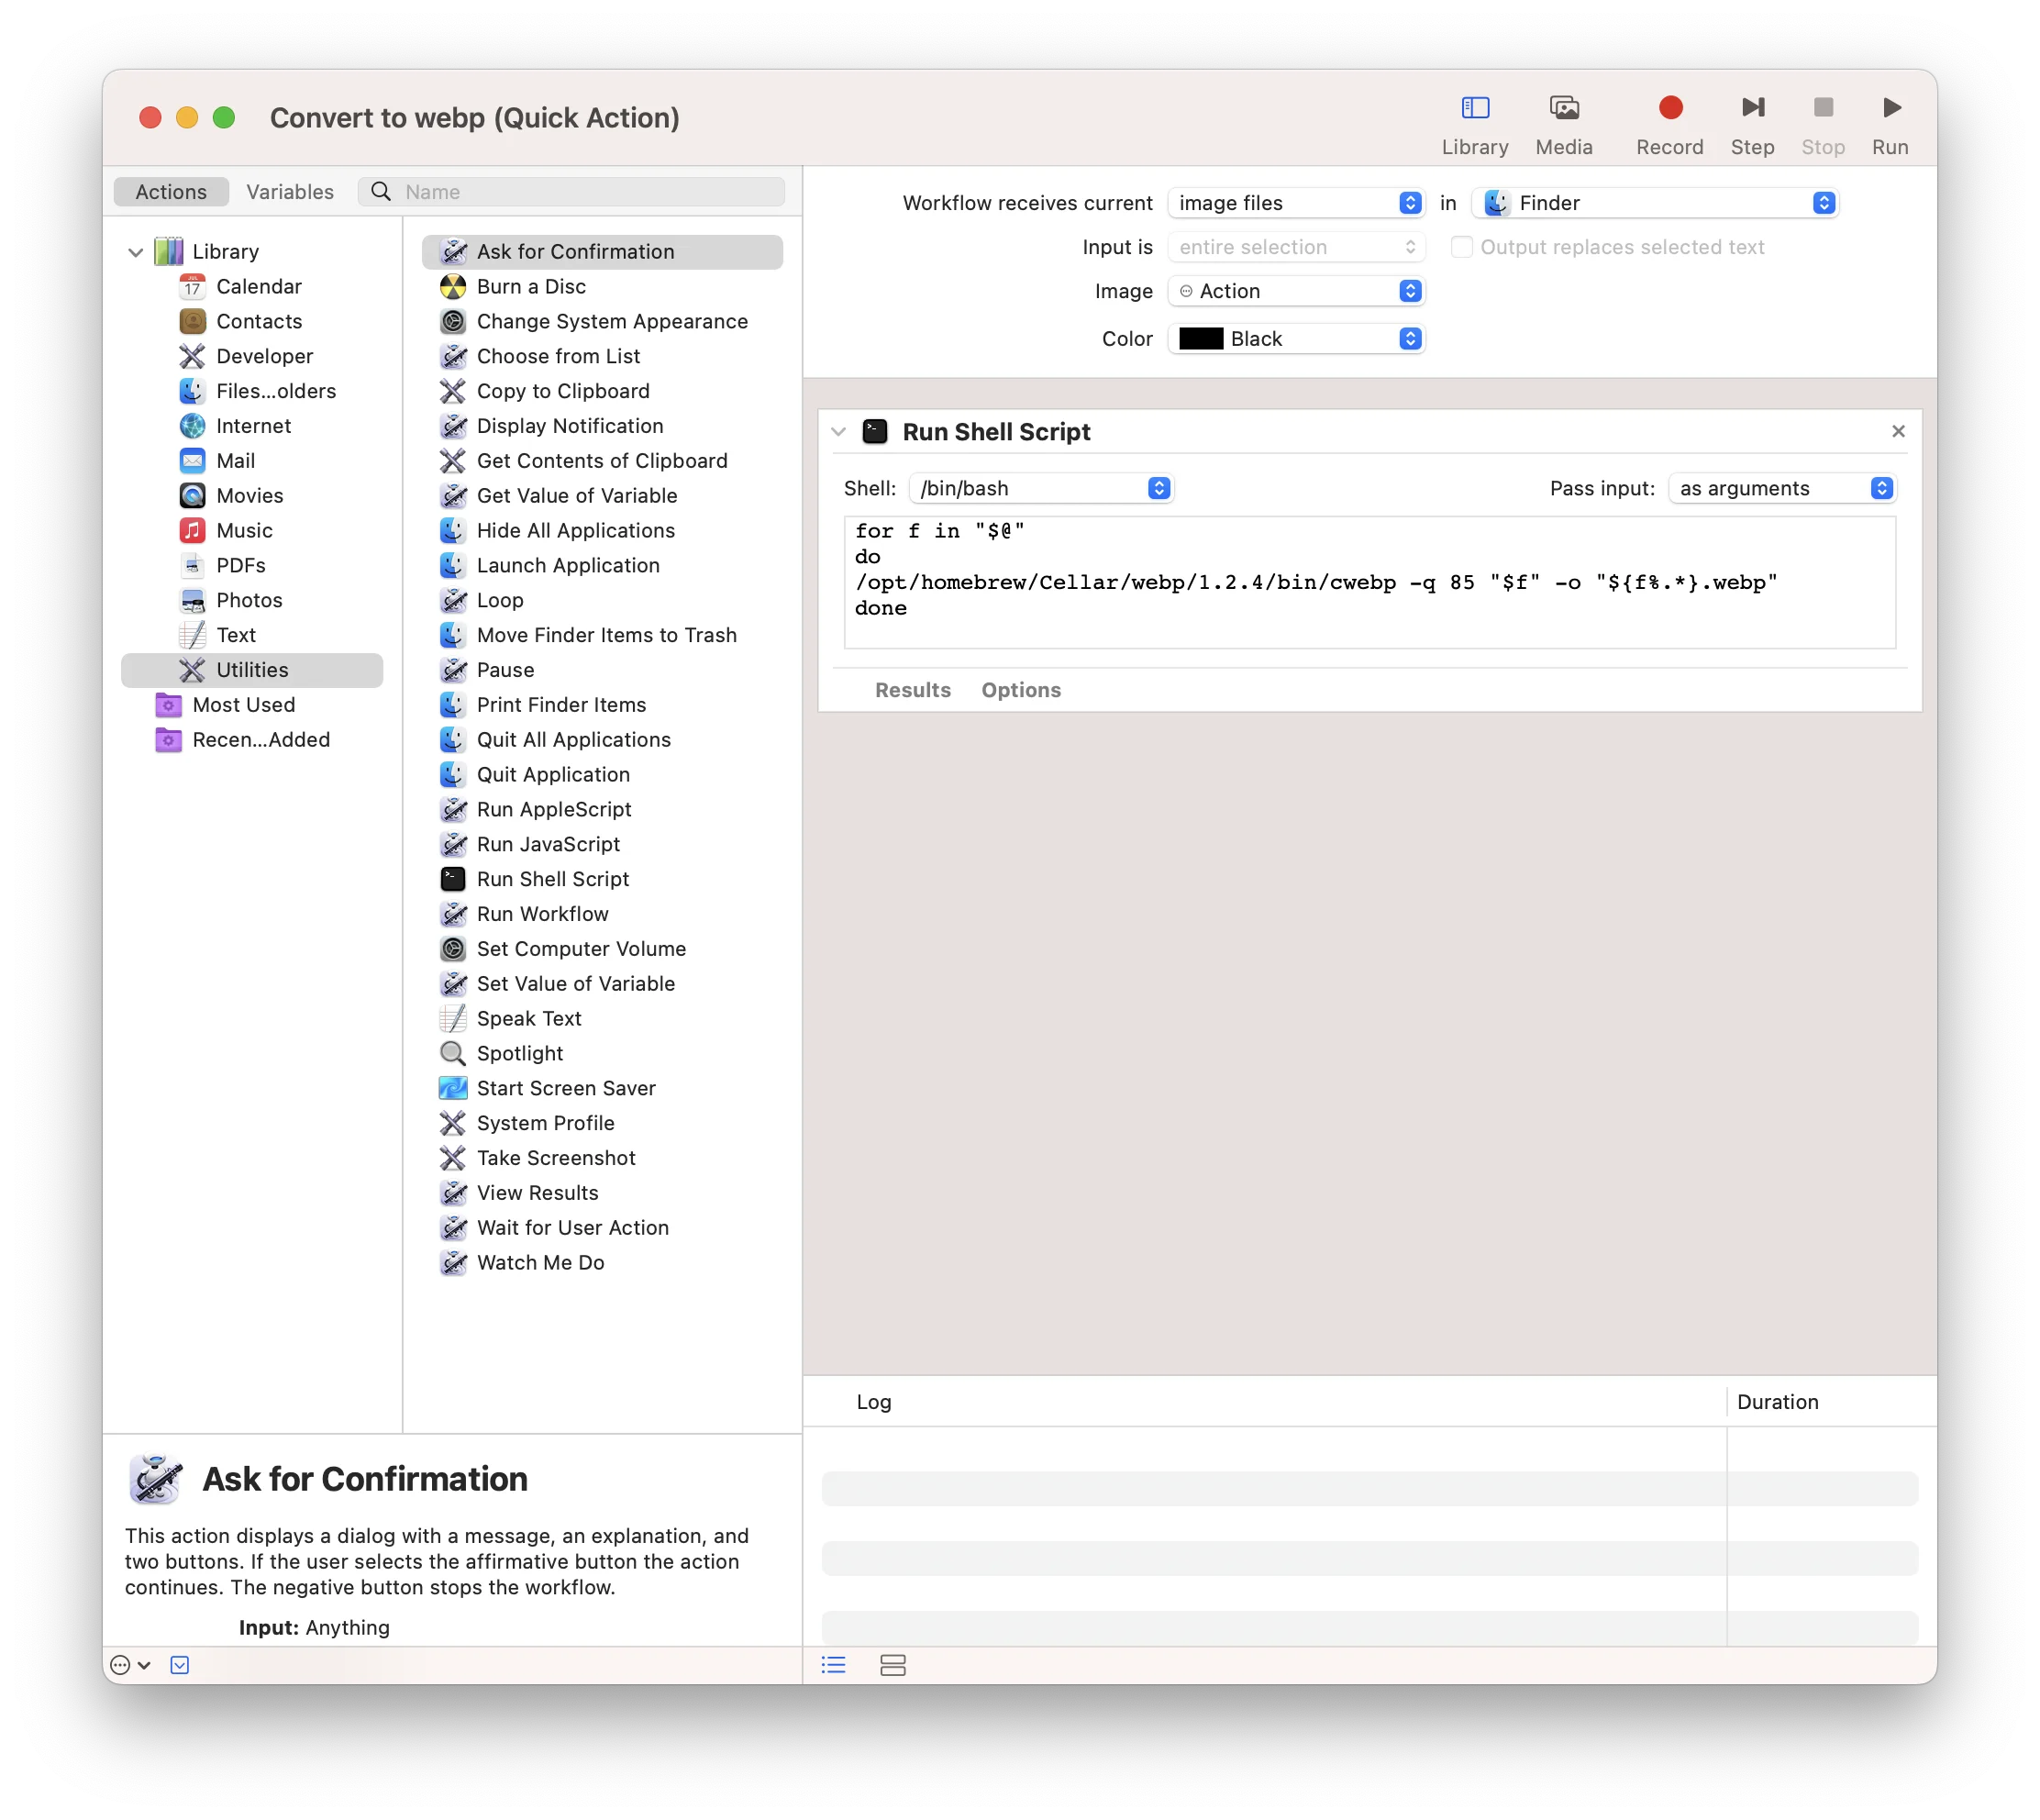
3) Set "Workflow receives current" to image files
4) Set the label "in" to Finder
5) From the left pane, select "Library > Utilities"
6) From the presented choices in the next pane, drag and drop Run Shell Script into the far right pane
7) Set the area "Pass input" to as arguments
8) Enter the following code below as your script and type ⌘-S to save (name it something like "Convert to webp")
for f in "$@"
do
/usr/local/bin/cwebp -q 85 "$f" -o "${f%.*}.webp"
done
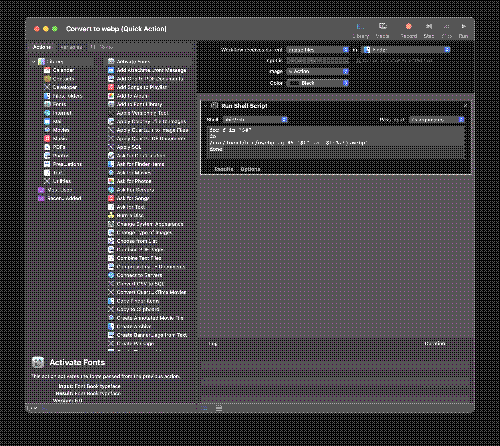
For visual reference, it should look something like this:
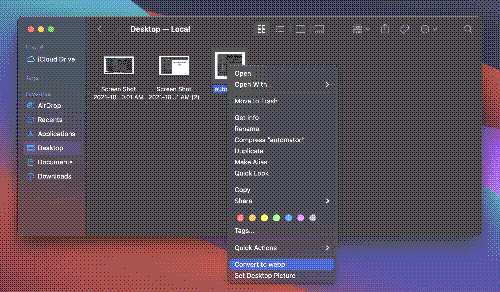
And when right-clicking an image file in the Finder window, it should now give you the option to convert:
Making edits to your script
If you ever have the need to edit this script (for example, changing the default 85 quality parameter), you will need to navigate to your ~/Library/Services folder and open your custom webp Quick Action in the Automator application.
Simple as that!
Possible Hiccups
I was contacted by the very helpful Kev Quirk about a minor problem he encountered while following this tutorial. When trying to run cwebp he received the following error message:
cwebp cannot be opened because it's from an unverified developer
Doing the next steps seemed to have fixed this issue for him:
- Click on the "Open in Finder" in the error message prompt
- Double-click on the
cwebputility to open in Terminal - You'll then be prompted with a pop-up asking if you wish to execute
After following these steps, the issue should be resolved.