I recently came across the incredibly cool design for an "ultimate Raspberry Pi computer" by NODE and was inspired to create my own "portable" Pi device. Although, with my concept, I decided to set a few restrictions on the build:
- I wanted to keep the total cost as low as possible
- including the Pi Zero and extra hardware
- I wanted to avoid any custom casings or need for 3D printed materials
- I wanted to make the full design extremely portable / lightweight
- I wanted to keep the build as user-friendly as possible (no soldering, odd hacks etc.)
With these constraints put in place, I built my very own Raspberry Pi Zero "hacker" terminal. You can see the finished product below:
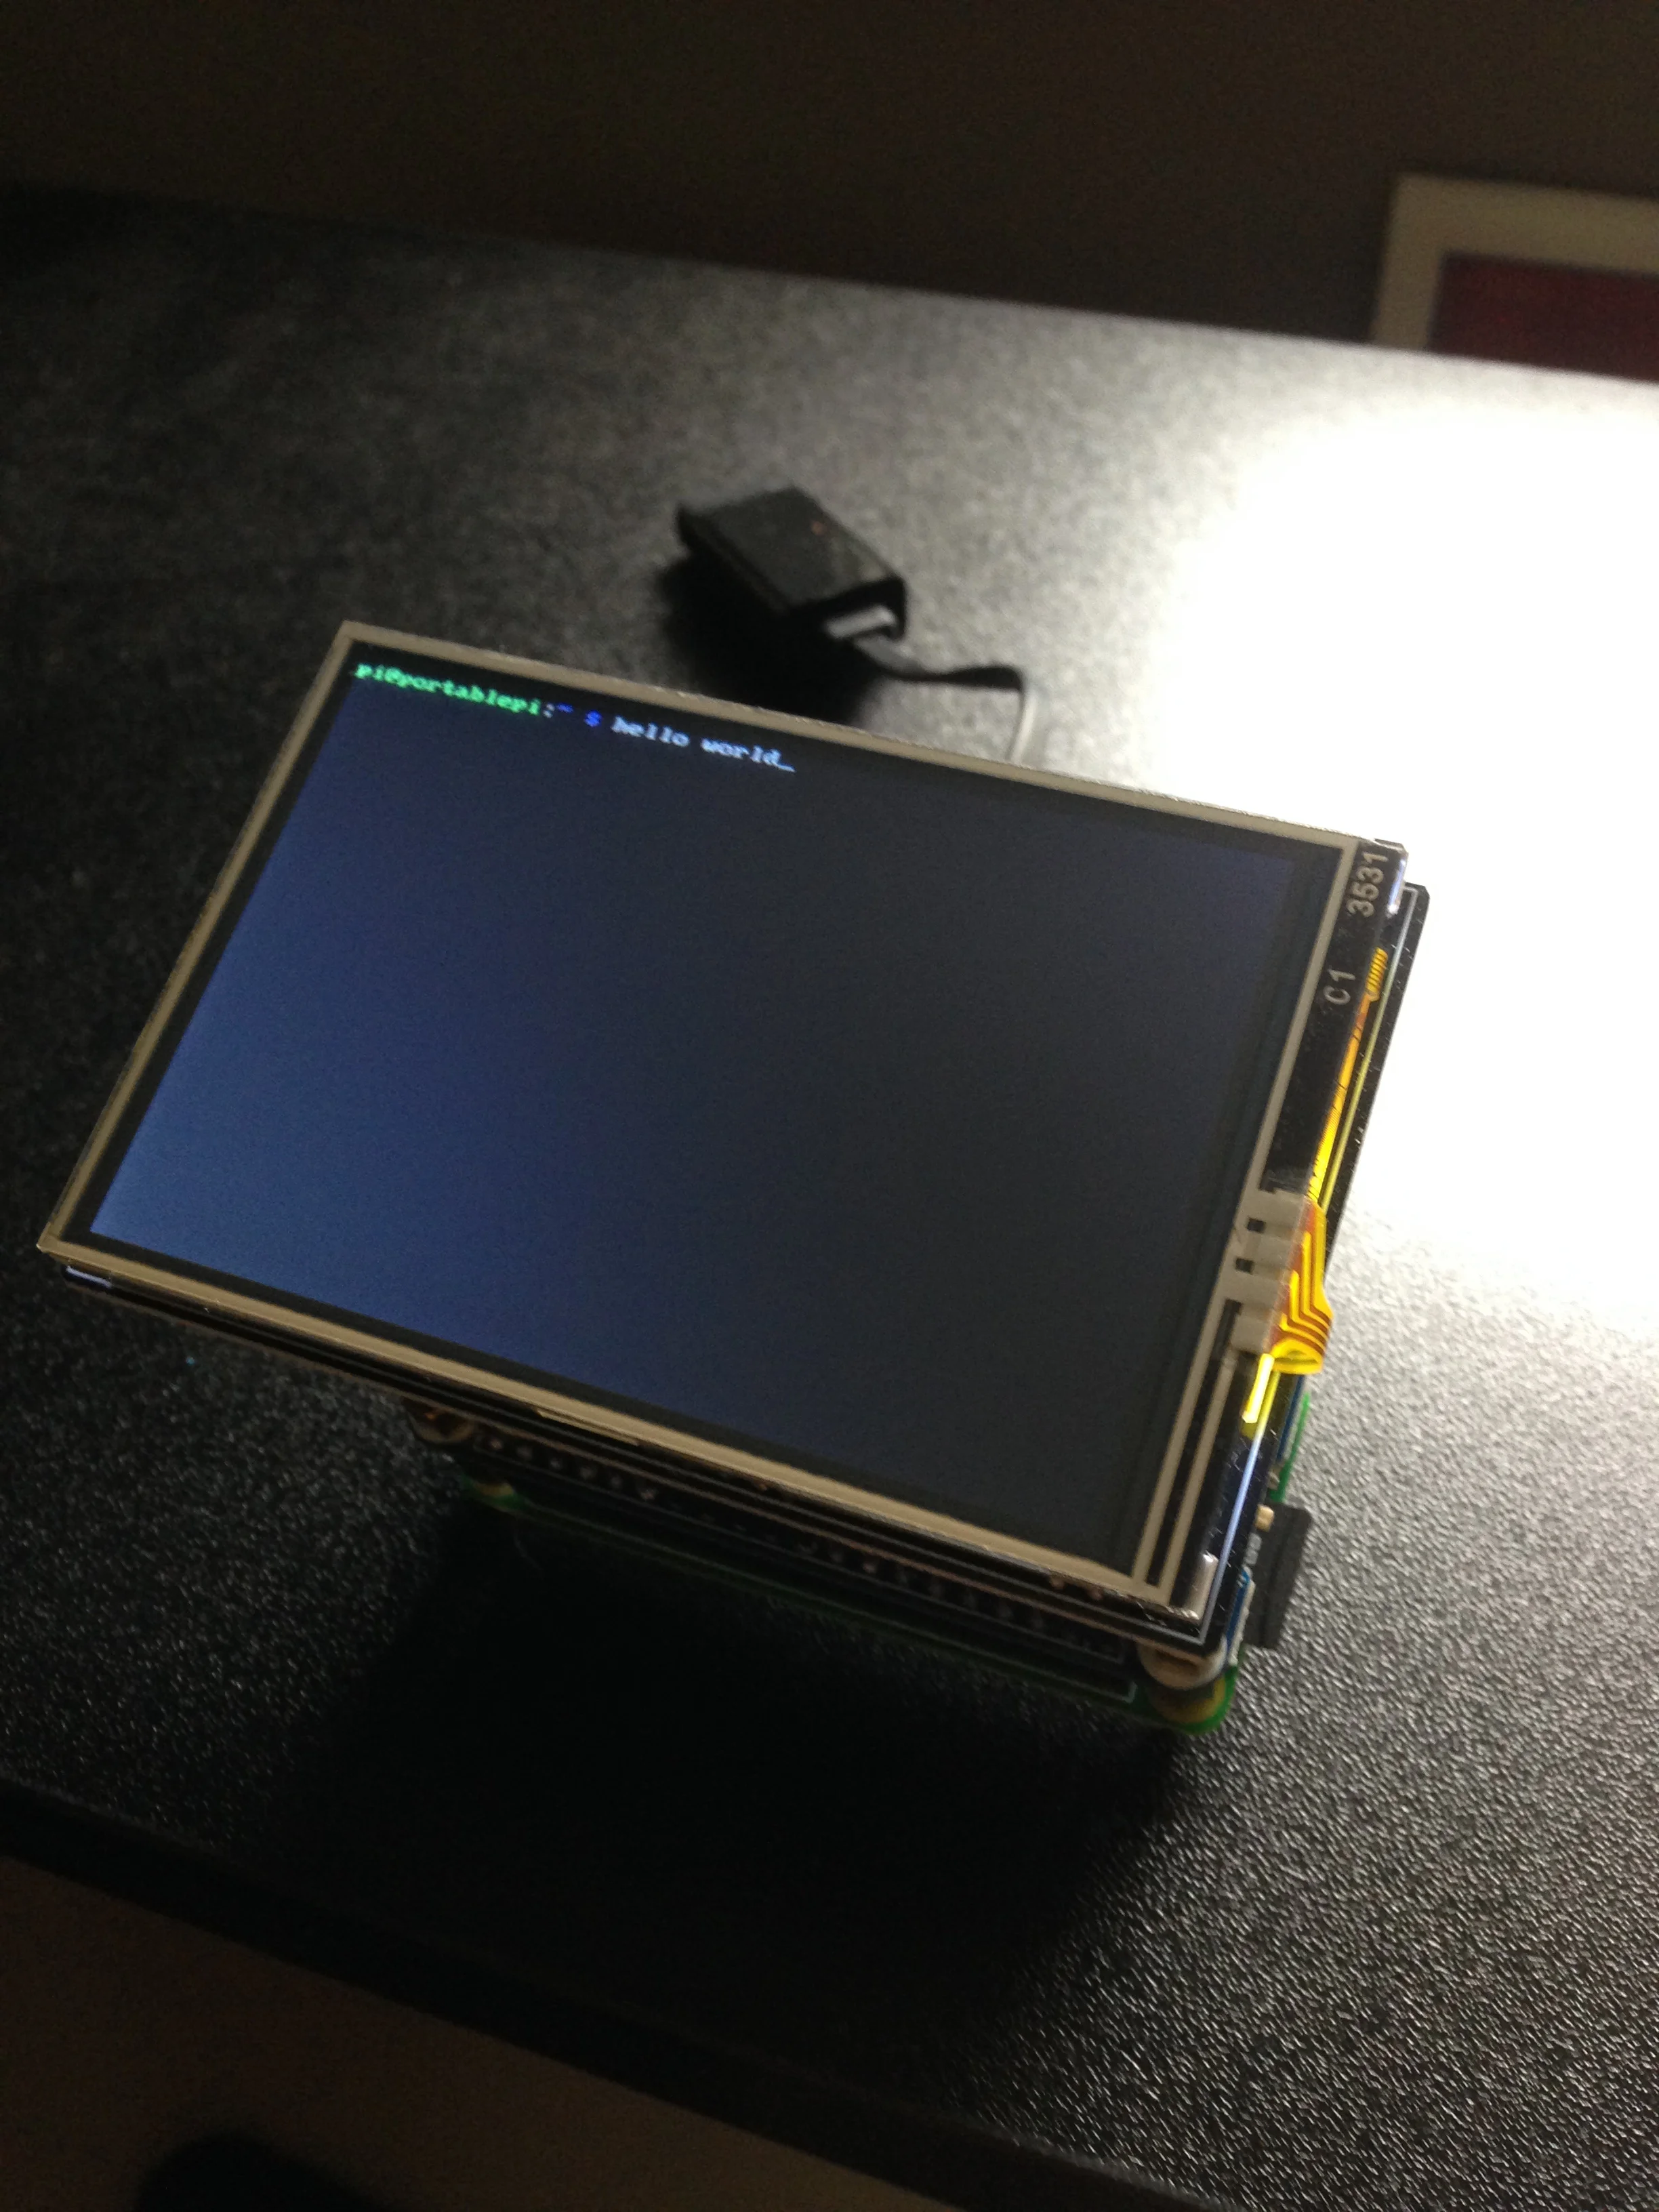
I'm pretty happy with the final outcome and best of all - you can easily recreate this yourself with little-to-no effort!
So enough chit-chat - let's build this bad-boy!
Note: Most items in the hardware section are Amazon affiliate links
Table of Contents
Setting Expectations
This hardware will not replace your laptop or any other "high-powered" portable device. Honestly, you're mobile phone would (most likely) work better in terms of a compact-sized computer. The concept behind this "portable pi" project was to make something for fun.
Please reserve any sassy comments about how buying a cheap $50 laptop off eBay would be more efficient than building out something like I have done here. You're missing the point entirely.
Moving on for those still interested...
The Hardware
I live in Canada, so some of the options are based on available hardware near my location. You're likely to find similar hardware close to your own country for better pricing / shipping costs.
Note: I've decided to use a wireless, USB dongle-based keyboard. You can opt to use a bluetooth-based keyboard, but I just find them more trouble than they are worth (keeping a charge, losing connections, interference from other devices)
- SBC: Raspberry Pi Zero WH
- Storage / OS: 64GB Micro SD Card (Always have an SD backup!)
- Battery HAT: Li-ion Battery HAT
- Battery: This depends on your location. I was able to order online through Walmart, but if you live in the USA there are plenty of battery-specific vendors available. Find whatever works best for your needs!
- Display: KeDei 3.5-inch TFT Display
- Keyboard: Mini USB Wireless Keyboard
- Adapter: Micro USB OTG Cable
Raspberry Pi Zero WH
You will need a Raspberry Pi Zero W with GPIO header pins already soldered on to the board. (You could also do this yourself manually if you have the tools and skill to do so)
Li-Ion Battery HAT
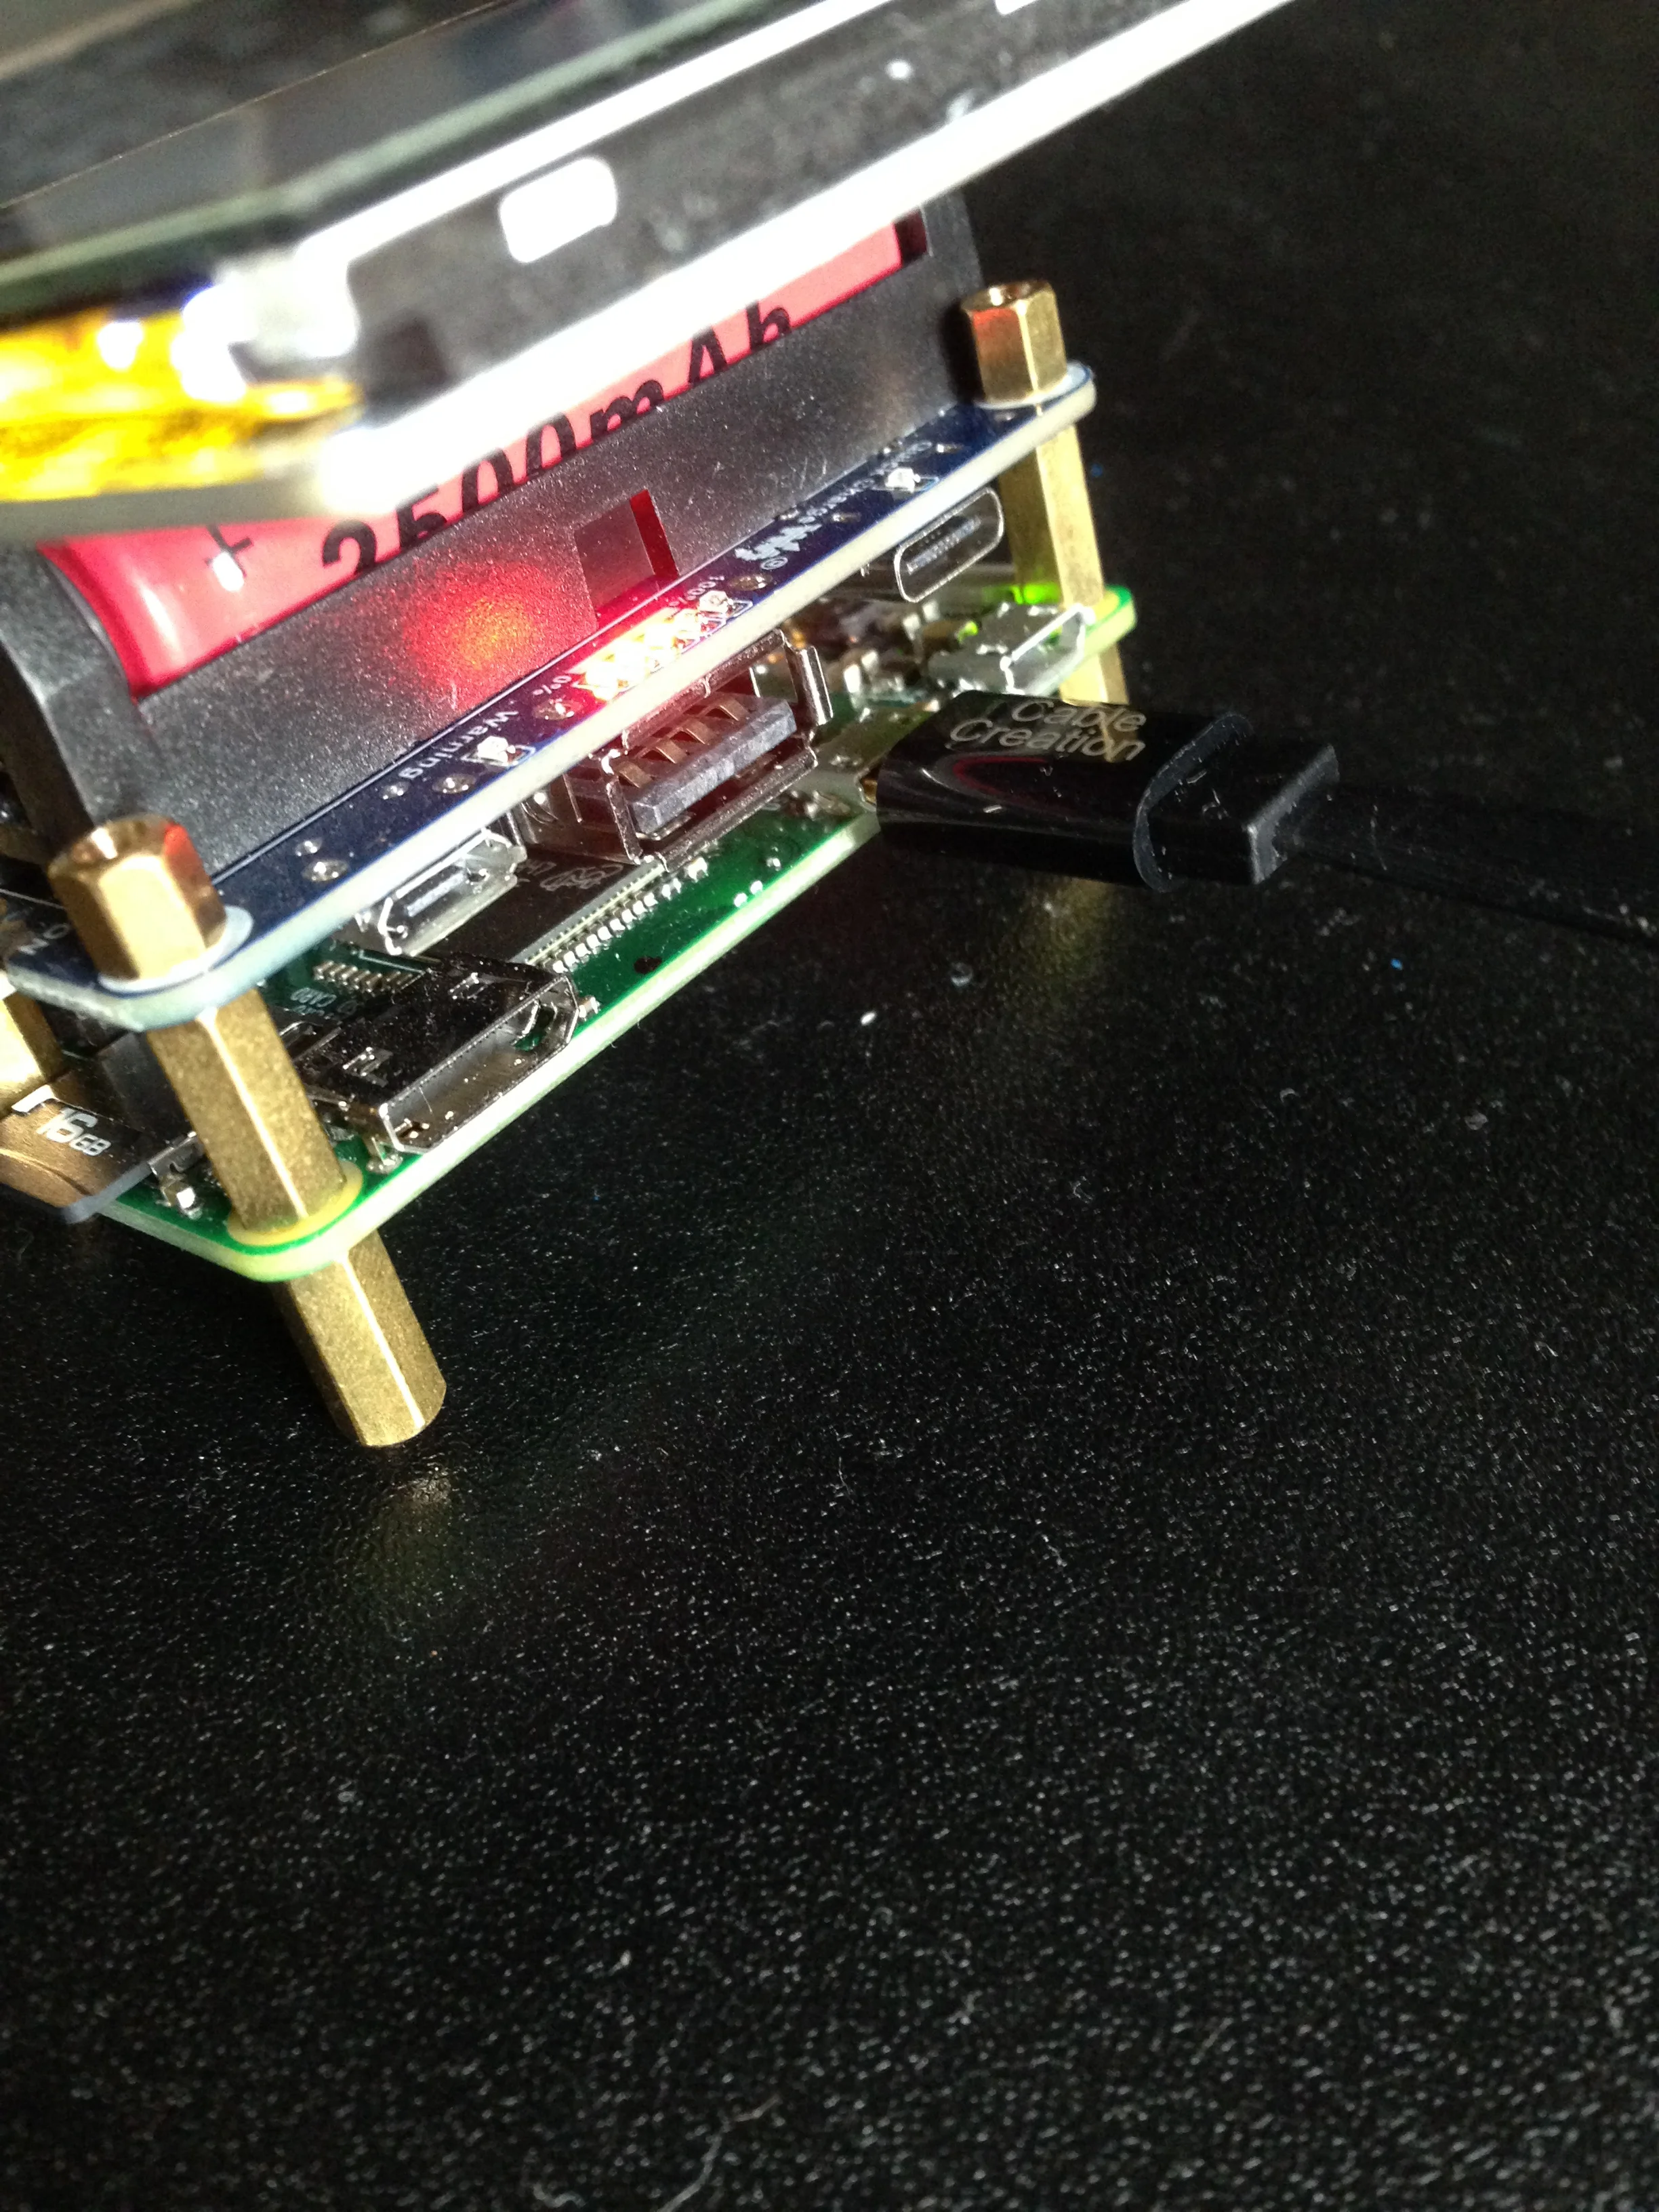
This HAT holds a single li-ion battery and for our purposes will connect with our Pi Zero via the GPIO header pins. You could also look into double-set battery HATs if that is something you would prefer - for my needs a single rechargeable battery works fine.
Since our main "OS" is purely terminal based, I find you don't really need a li-ion battery with a massive amount of power storage. 2500mAh will easily last a handful of hours mucking about with emails, files and web browsing. Plus, you can always carry a few extras for swapping out on-the-go.
3.5-inch TFT Display
A simple and fairly cheap touchscreen display. We won't require our display to render videos or pretty graphics (since we will be entirely terminal-based) so this works just fine for our needs. I am using version 6.3 for this build.
Micro USB OTG Adapter
As mentioned above, this item is optional if you feel more comfortable with using a pure bluetooth keyboard. I just personally prefer this method.
Wireless Keyboard
In my product demo image at the beginning of the article, I'm actually using an old Logitech wireless keyboard since this one still hasn't arrived. I plan to swap them out once I have it - the Logitech is far to large to be deemed "portable".
The Software
- Operating System: Raspberry Pi OS Lite
- Display Driver: KeDei 3.5 Driver
- Email: Neomutt (via Mutt Wizard)
- Web Browser: Lynx
- Text Editor: Nano
- Code Editor: Vim
Getting Setup
I will be setting up this "portable pi" via headless installation with my main Raspberry Pi 4 desktop. Included below are some quick instructions on how to setup the Raspberry Pi Zero for ssh access.
Preparing the microSD card
- Use Raspberry Pi Imager to write the Raspberry Pi Lite OS to your microSD card
- Once complete, remove the microSD storage device and then re-connect it
- Navigate to the
bootfolder of the microSD device - we will be adding 2 files here- First add a completely empty file and name it
ssh(no file extension) - Next add an empty file named
wpa_supplicant.conf
- First add a completely empty file and name it
Open the
wpa_supplicant.conffile in a code / text editor and paste the following (be sure to changecountryto your proper country code, as well as properly setting your network name / password):ctrl_interface=DIR=/var/run/wpa_supplicant GROUP=netdev update_config=1 country=US
network={ ssid="Your network name/SSID" psk="Your WPA/WPA2 security key" key_mgmt=WPA-PSK }
Unmount the microSD device, then place the microSD card in your RPi Zero
- Assemble the Raspberry Pi Zero with the Battery HAT (li-ion battery attached) connected via GPIO pins, and the 3.5 display connected on-top of the battery HAT's pins
- Turn on the battery HAT switch to power the RPi Zero. Give the device roughly 90 seconds to perform the initial boot
Note: the display will turn on but only show a white screen - this is normal
Connecting to your Zero via SSH
Open the terminal on your Raspberry Pi desktop and enter the following command:
ssh pi@raspberrypi.local
You will then be asked if you wish to trust this device (say yes), then prompted for the pi user's password - which is raspberry. After a moment you will be directly connected to your Raspberry Pi Zero. Hooray!
We just want to make a couple small configuration changes before going forward (mostly for security):
- Run the command
sudo raspi-config - Select "Change User Password" from the menu and change the password
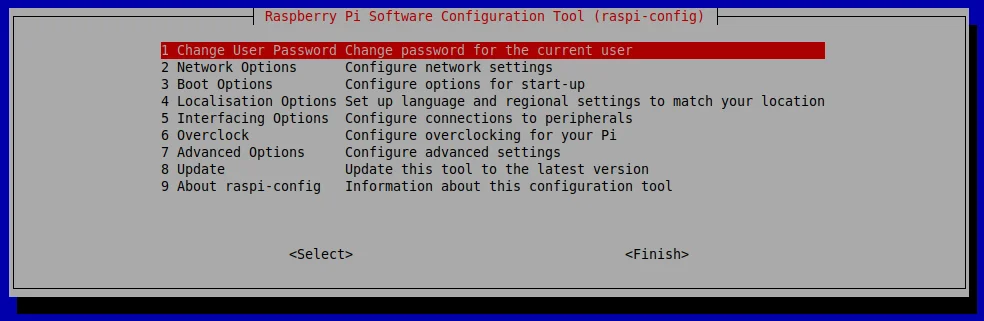
- After that, select "Network Options" and change your device name
- This will avoid any conflicts of connecting to newer RPi devices down the line
That's it!
Installing display driver
Next we will need to download and run the drivers needed for our 3.5-inch display to play nicely with our Pi Zero (just a blank white screen doesn't help us much). While connected to our RPi Zero via SSH, run the following commands:
wget http://kedei.net/raspberry/v6_1/LCD_show_v6_1_3.tar.gz
If you have snail-paced rural internet like I do, now is a good time to go and grab a coffee while this download completes.
Once the download has finished, extract the contents and navigate to the new directory and install the driver:
sudo tar xzf LCD_show_v6_1_3.tar.gz
cd LCD_show_v6_1_3
sudo ./LCD35_v
Once completed, the RPi Zero will reboot and everything should work as expected!
Installing software
I'm not going to jump into heavy details about installing terminal-based software for this setup. The links I've attached in the software section should provide you with more than enough information to get started. For reference, I'm using a very basic set of applications:
- Neomutt (emails)
- Lynx (quick and simple web browsing)
- Nano (writing notes / blog posts in a hurry)
- Vim (making any config edits or project work)
Final Summary
There you have it - a terminal-based, portable Raspberry Pi Zero "hacker" device.
Is it practical? Not really. Can it replace any other portable device you might own? Probably not. Is it fun to make and experiment on? You bet! And in the end - isn't that what matters most with pet Pi projects?